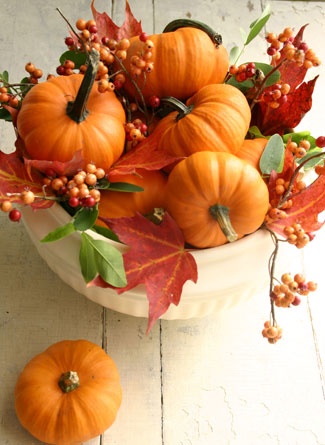


On these walks of mine, I often collect fallen leaves I find during my search for amazing photo shots. When I was little, I used to keep these leaves between the pages of an old book. Now I just put them in a small vase until they dry completely.
But recently I came across a very clever idea what to do with fallen maple leaves. Apparently, some creative person thought of a way to fold maple leaves into roses. Amazing! The autumn bouquet looks very cute and I will definitely try this idea during my next walk in the park.
Here is the full tutorial for creating roses out of maple leaves:
]]>

What to Do with the Old Mascara

It’s simple – keep the brush and wash it well. If you really like it, you can use it with your new mascara. Or you can brush your eyebrows with it and split mat eyelashes in order to achieve the perfect look.
What to Do with the Old Eye Shadows

Girls, who enjoy creating different stuff, will be more than happy to learn that the old eye shadows are ideal for drawing on paper, wood and even jewellery.
What to Do with the Old Eye Pencils

The dry eye pencil can be used as a regular one. For example, you can write a note directly on the surface of your fridge. Don’t worry, it will easily come off. The old eye pencils are also useful during home remodelling, because you can mark corners, walls, etc. with it.
What to Do with the Old Body Lotions and Face Creams

Use them for cleaning leather clothes and accessories, such as boots, gloves, jackets and so on. All you should do is rub the product in and let it dry. Wipe off the leftovers and you will be amazed by the gorgeous look of your leather items.
What to Do with the Old Nail Polishers

Put your imagination to work and paint different shapes on several inexpensive glasses using the old nail polishers. You can fix the decoration with clearcoat. Nail polishers can be used for colouring not only glasses but keys, jewellery boxes, frames and so on.
]]>


 ]]>
]]>

You Will Need:
- Pieces of old silk ties (or shirts, or scarves);
- Scissors;
- Cotton cloth;
- Thread or soft wire;
Instructions:
- Cut the ties and remove the lining, until there is only silk left.
- Cut the silk into pieces, big enough to cover one egg.
- Wrap the Easter egg and leave the front of the fabric outside.

- Tighten as much as possible, but be careful not to break the egg. The tighter the silk, the better the dye effect.
- Now wrap the tied egg with the cotton cloth. An old pillowcase will be ideal for this procedure.

- Tie the egg with a thread or soft wire.
- Put the eggs in a pot and cover them with water.
- Add a quarter cup of vinegar and let them boil for 20 minutes.
- After that take the eggs out and arrange them on a towel to dry and cool down.
- Untie the Easter eggs and enjoy their colourful and joyful shells.

Additional Tips:
To guarantee the perfect dyeing of the egg shells, you will need high quality fabric. Therefore, make sure that the one you will use is not polyester or another synthetic fabric. You can usually find this information on the label of the tie or scarf.
If you don’t have old silk ties, you can easily find such in a local outlet store. In this way the Easter dyeing won’t cost you a fortune.
When you decide what ties to choose, go for dark colours. Navy, purple and red are the best choice. Ties decorated with small shapes can also be useful, because they will print on the egg and make it look extraordinary.
Happy Easter!
]]>


You will need:
- 1-2 lemons or limes
- 1 orange
- 200ml water
- 200ml vodka
Instructions:
- Grate the rind of the lemons and oranges or cut it into thin stripes.
- Put the citrus rind in a plastic or glass bottle with a sprayer. You can also use an empty detergent vial or a window cleanser bottle.
- Add the water and vodka in it and let it stay for several days, so the liquid ingredients will have enough time to absorb the fruit scent.
- Every morning, when you ventilate your home, spray a couple of times with your DIY air freshener and enjoy the amazing fresh smell.
Additional Tip:
For even richer fragrance, add around dozen drops of lavender, mint, ginger or another essential oil to the air freshener.
Spring will come earlier in your home!
]]>


Rag or Duster
Kids often make messes and if you wonder with what to clean them, the old sock can serve as a rag or a duster. In this way you will save money from buying microfibre cloths.
Sock Toy

Surprise your child with a cute sock toy. You will need a needle, thread, yarn and several buttons or beads. Put your imagination to work and create a unique toy. If you lack inspiration, check out these great DIY tutorials.
Feet Warmer
I know that usually this is the main purpose of socks, but here I have something else in mind. Fill the sock with rice, tie it well and put it in the microwave for 2-3 minutes. After that your feet can enjoy the warmth for a long time.
Hair Band

Socks are usually very elastic, so if you cut one in circles you’ll have lots of hair bands to use at home. Or you can cut the tip of the sock, roll it and then use it for making the perfect hair bun.
Skin Softener
If the skin of your feet or hands is too rough, you can soften it very easily. Before you go to bed, rub them thoroughly with cream and after that put two old cotton socks on them. You will be amazed by the great result in the morning.
Air Freshener
Another great idea for reusing old and lonely socks is to turn them into air fresheners. Fill a sock with sprigs of dried lavender and put it in the wardrobe against moths. If you want to refresh your living room, fill the sock with cinnamon sticks and dried flowers.
Creative Insulation

A perfect way to reuse an old sock is to make a huge stuffed snake from it. This snake can be put in front of doors or windows to prevent the cold air from getting inside your home. Such a fun and creative way to insulate a room, don’t you think? If you want to make this sock snake, follow the tutorial here.
]]>


Hello, it’s Johanna again and this week I want to present you another easy and creative tutorial for Valentine’s Day. This year I decided to make a Valentine card for my boyfriend instead of buying him one. Usually, I’m not able to find a card that is not pink or red and that is more suitable for men.
But one day I saw this amazing template on Pinterest and I knew that I was going to use it.

For the tutorial I chose dark purple and silver paper, because I think that these colours are a little bit more masculine. And the pop-up design makes the Valentine card unique, simple and creative. The paper I bought was too thick for the printer and that’s why I decided to draw the template by myself.
So, here is what you need:

- 2 sheets of paper
- a pencil
- a ruler
- scissors
- glue for paper
- a paper knife
Instructions for Pop-up Valentine Card:
Step 1

Grab the pencil and the ruler and start drawing the letter “I”. Mine is 1cm wide, but if you want you can make yours bigger. Some lines should be solid and some – dotted, but I’ll explain later why.
Step 2

After you make the “I”, it’s time to make the heart. You will need a steady hand for it.
Step 3

The last thing you need to draw is the letter “U” and then the sign is complete. It should look like this.
Step 4

Cut the solid lines with the paper knife and fold along dotted lines.
Step 5

Using the scissors, cut 1cm of each side of the silver paper.
Step 6

Spread the glue along the purple paper and then gently press the silver sheet on it, until it’s glued properly.

And the pop-up Valentine card is ready. It turned out pretty well, considering it was drawn by hand. Hope that my boyfriend will be pleasantly surprised, especially when he hears that I did this Valentine card by myself.
Happy Valentine’s Day to all!
]]>

I even decided to decorate my home for the occasion. There is one completely white wall in my living room and it looks so boring and lonely ever since I removed the Christmas lights from it. So, I wanted to give a colourful touch to it and then I had the greatest idea – Valentine hearts garland.
Below I will explain how you can also make one by yourself:
You will need:

- felt hearts (as many and as colourful as you prefer)
- scissors
- a needle
- thread
- scotch tape
Instructions for DIY Valentine Garland:
Step 1
I bought my hearts straight from a local crafts shop, but if you can’t find such, you may need to cut them out on your own. You’ll need to make a heart template, then draw it several times on the felt and cut out the shapes.
Step 2

Insert the thread in the needle and start sewing the hearts one by one as shown on the picture.
Step 3

It’s up to you to decide in what order you are going to arrange them. I chose six different colours for my Valentine garland, because I want to use it even after the holiday, so it looks like a spring garland as well.
Step 4

When you have sewn all the hearts, don’t forget to make small knots on both ends, so the hearts won’t slip out. Spread the hearts along the thread at whatever distance you prefer.
Step 5

Hang the Valentine heart garland on a wall or fireplace, using some scotch tape. Once done, the garland could be easily freshen up each year, saving it from going to waste.
And this is it – beautiful and easy DIY idea. I’m so proud of myself, because I created such a simple and lovely garland for Valentine’s Day and I’m sure you’d be too.
]]>
 During winter time people often rearrange their wardrobes to find a place for all the thick winter clothes, which usually take a lot of space. Most of the times when you do this, you find some old sweaters, which you haven’t worn for ages and even hardly remember. But don’t throw them away, because they are still very useful – you can upcycle them in so many interesting and creative things for the home.
Here are 10 brilliant DIY ideas for reusing old sweaters:
Cup Warmers
In the cold days of January one of your best friends is the hot cup of tea. If you want to keep the heath for longer, you can make a cute cup warmer from the sleeve of an old sweater.
Pillowcase
The rest of the sweater can be used for making decorative pillowcases. If you have enough time and yarn, you can even create a cover for a whole sofa.
Coasters
Another brilliant DIY idea is to make cup coasters – just cut out circles, squares or any other shapes from the old sweater and then sew the edges with a thread, so they won’t loosen with time.
Jewellery
Leftover yarn can be your basic material for creating different pieces of jewellery – bracelets, earrings, brooches and others.
Handbag
If you have already used the sleeves and are wondering what to do with the rest of the sweater, you can turn it into a beautiful handbag. Decide what size will best suit your needs and then choose the type of straps you want – wooden, metal, plastic or yarn.
Wreath
One of the most beautiful ways for reusing old sweaters is to turn them into a yarn wreath. You can easily do it yourself and bring a fresh touch in your home. It’s up to you to decide, if you are going to hang the wreath on a wall or the front door. You can make a yarn wreath for different occasions, such as Christmas, St. Valentine’s Day, Easter, Halloween and so on.
Pot Covers
Are your pots brown, boring and not matching your home décor at all? Now you change that by knitting pot covers from the old yarn. Actually, these covers can also be used for pencil holders, vases, bottles, etc.
Gift Wrapping
Instead of buying expensive gift wrapping paper, you can make your gifts unique by using yarn from old sweaters. Such a gift will bring a smile on the face of any person.
Pompoms
These fluffy balls are very simple to make and afterwards you can use them for so many things – decoration, garlands, bookmarks, flowers and so on.
Decoration
Old sweaters can also be used for decorating purposes. You can’t even imagine what beautiful things you can create just with little bit of yarn, some balloons and glue.
]]>
What You Need
- 3-4 apples
- 3-4 tea candles
- a spoon
- a sharp knife
- a pencil

How to Make the Apple Candle Holder
- Wash the apples with cool water and then dry them with a paper towel.
- With the pencil draw a circle, corresponding to the size of the candles, on top of the apples.
- Cut out the drawn circle with a sharp knife and carve the excess apple filling. Don’t throw it away, because you can use it later for creating a delicious apple pie for example.
- Have in mind that you shouldn’t carve too deep, because it will be hard to see the flame of the candle afterwards.
- Put a tea candle inside the apple and you are ready. Hint: for even more lovely scent you can sprinkle the apple with a dash of cinnamon before putting the candle inside it.

If you have followed these instructions, you will end up with beautiful, inexpensive, aromatic candle holder, which you can place in any part of your home. Put them on the table when you are welcoming guests and they will be pleasantly surprised. You can also use these DIY candle holders as decoration for special occasions like holidays, birthdays, anniversaries and so on.
The only disadvantage of this creative DIY idea is that it won’t last long due to the natural products you will use, but still it is worth it.
]]>